Writing an image to USB (with StickWizz)

Requires 

  • Image file as a .stw or .dd file on a PC running Windows 10 or later versions
  • StickWizz application on your PC (see Preparing a recovery image for USB)
  • USB stick on local port with 4 GB memory space, write access
  1. Plug the USB stick into the PC.
    Note that the Windows Explorer must not be open on the USB drive.

  2. Run the StickWizz.exe program.

    The language depends on the Windows display language selected.
    The checksum is calculated and compared to the one provided.

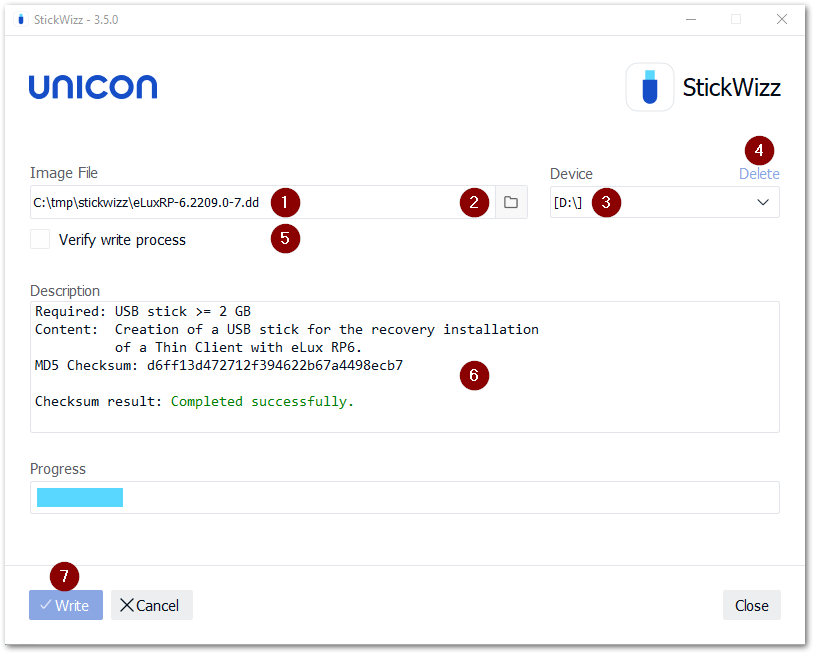
  3. Check whether the appropriate source under Image file (1) and the appropriate destination under Device (3) are selected.

  4. Click Write (7).

The image is written to the USB stick. A message confirms the successful completion.

1 After StickWizz is started, it shows a .stw or .dd file located in the same directory.
2 Browse to select your image file from another directory, if required.
3 Device /drive, on which a USB stick is connected

Choose a different drive if required.

4 Delete all data from the selected device (before writing the image)
5 During the write process, each written data packet will be compared to the source.
6 As soon as StickWizz opens with the specified file, the checksum is calculated and displayed.
7 Start writing